I was talking to my Mum the other day about the way we cook. I’d gone home for the weekend for both Mother’s Day and a well needed rest. It had just been one of those weeks where everything seemed to be on top of me and I couldn’t shake the daily stresses and strains like I usually would. It’s to do with a whole heap of things, but it’s mostly change. Your early twenties are full of it I guess – leaving university, maybe some travelling, trying to decide what you want to do, trying to find a job that won’t leave you suicidal, trying not to become suicidal whilst looking for a job, same old, same old. Add to that the fact that to get anywhere these days you have to put in more than your fair share of unpaid work to get experience, which means I’m currently working 6 days a week hoping it’ll lead me somewhere I want to be.
But in my world, there’s not much that you can’t heal with food. Whether it’s your health or your mind, sometimes the eating or preparing of just the right food makes everything seem ok. Turns out both me and my Mum have a similar approach when it comes to cooking. It usually involves scanning a few recipes for inspiration, maybe picking up a tip or two about how to prepare something a little more fiddly, but ultimately just going with what’s in the fridge and winging it. Looking at what you have and making the most of it. Realistically that’s how I imagine most people cook on a daily basis. Nobody has the time or effort to always painstakingly follow a recipe word by word, and most people would probably prefer not to head to the shops and spend their hard earned pennies for every meal. Like you should take every day as it comes, good or bad, productive or not, take your food and inspiration as it comes. Don’t worry about adding in more stress to make something perfect.
So it was today. I’ve had to take it as it came. After a bad week last week, I was hoping for a fresh start today. I had plans to be productive, head to yoga after not going for over a week, and to get my health back on track as I could sense that if I didn’t get some good food down me soon then I would suffer the consequences. But suffering I am. An unproductive day, and a general bluergh-y kind of feeling that has developed into a definite sort of ill-y feeling. So no yoga, and so little accomplished. So to the fridge I went. A fridge full of white cabbage and no inkling of what I should do with it. To the computer I went, and searched ‘cabbage’ in a few of my favourite food blogs, where I mostly turn these days for a lack of cookbooks. Sure enough, a recipe appeared that gave me a little inspiration.
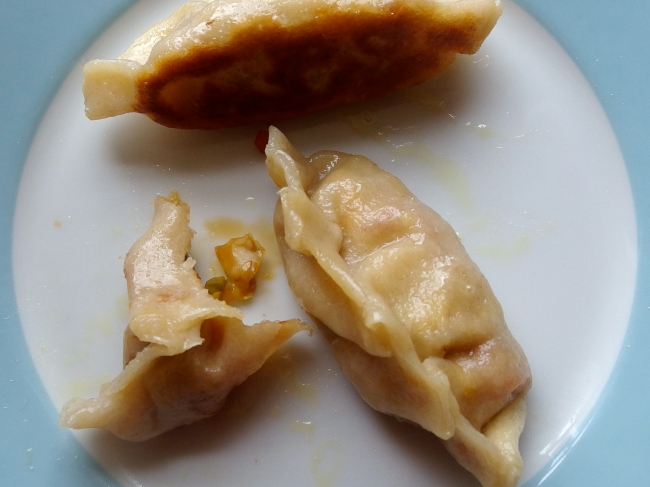
Potsticker dumplings. But that’s not to say I went ahead and made sure I had all the ingredients listed, rather I remembered having made a different recipe a few times before, never one I followed to the letter but rather a different one I read up and went ahead and made somewhat blindly with great results. All I really cared about was that these little babies could be filled up with a hell of a lot of white cabbage, made tasty with a healthy dose of asian flavourings.
So it came to be. I’ve accepted today. No, I didn’t get much done but I did rearrange my bedroom (win). I’ve accepted that today is a bit of a fail, but at least I’ve got some damn tasty dumplings to feed my sorry self. I also feel like this blog post is being taken as it comes. I didn’t know whether with this blog I should attempt to match the incredible styling and photography that I’ve seen in other places, but it feels more natural to me that I just let it come, and perhaps allow in a little more of the reality of what my cooking is like. Probably pretty messy, maybe not the prettiest, but (I hope) worth sharing. It was only half way through cooking these dumplings that I came to the realisation that I shouldn’t be too worried about perfection in every post and that it’s ok to show things as they really are, so I’m sorry the photos only start a little way into the process.
Asian Potstickers (makes about 30)
When it comes to the asian flavourings I’ve used here (soy, rice vinegar, fish sauce) it helps that I have a few bottles on hand. They can be a little pricey, but they last a long time, and mean you can turn meagre ingredients into a bit of a feast, so they’re worth keeping in your larder. Don’t worry about being too precise, cooking is all about learning to use flavour how you like it, so adjust according to taste and use what you have – lime juice, mirin, shaoxing wine, sriracha sauce…
- 500g flour, plus more for dusting
- 1 white cabbage
- 5 small carrots
- thumb of ginger, grated
- big pinch of pickled ginger
- 2 tbsp sesame seeds
- big splash each of light and dark soy sauce, rice vinegar, fish sauce (I’m never precise with these, whatever mix you like)
- dash of toasted sesame oil
The wrappers (If you don’t want to make your own, then you can buy dumpling wrappers from asian supermarkets)
- Put the flour in a bowl and boil the kettle.
- Pour a little of the boiled water into the flour at a time, and use a spoon to combine.
- Continue to add the water a little at a time until the dough just comes together, and by using your hands you can mix in the remaining flour. You don’t want a wet dough, it should feel quite firm and shouldn’t feel very sticky.
- Wrap the dough in clingfilm or a bag and let it rest in the fridge for 30 mins
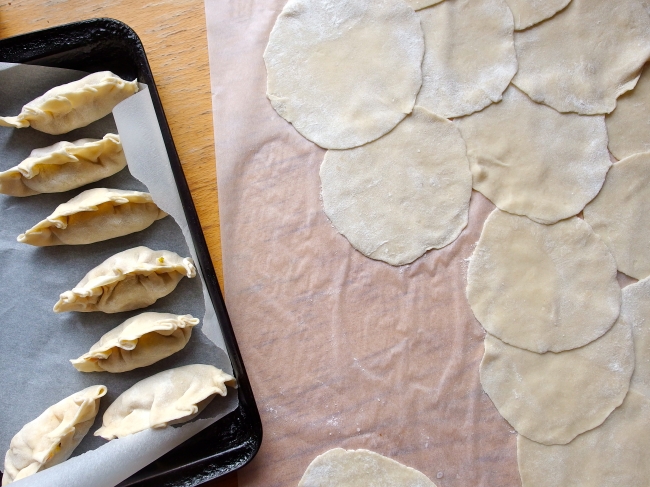
- Lightly dust a chopping board with flour. Get the dough from the fridge and divide in two. Take one half and roll into a long sausage, about an inch thick. Slice the dough into rounds of around 1cm. Lightly roll each piece of dough into a ball and set aside. Do the same to the other half of the dough.
- Take a ball of dough and lightly squash it on the floured chopping board. Using a rolling pin (or I’ve been known to use a wine bottle) gently roll the ball into a thin disc, turning once to ensure it’s well floured and not getting stuck to the board. When I roll the balls into the wrappers I gently spin the rolling pin as I do it, not pressing too hard, and it seems to work pretty well, ending up with a nice circular wrapper.
- Do the same with all the balls of dough, placing them onto a lightly floured board or piece of baking parchment as you make them.
The filling
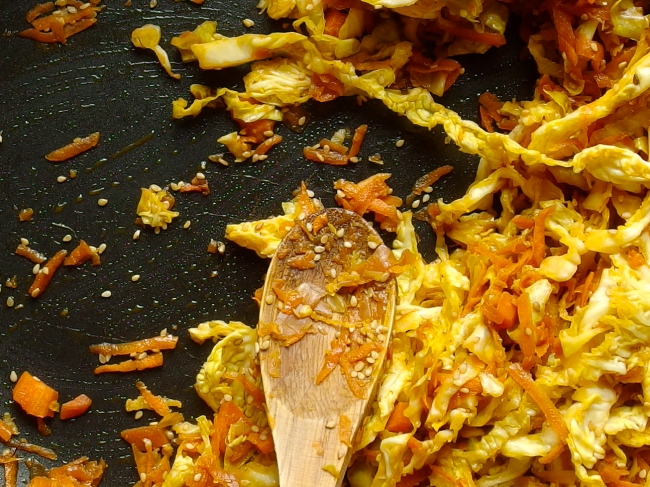
- Finely shred your cabbage and peel and grate the carrots. In a large pan, heat some coconut oil and then gently fry the cabbage and carrot with the ginger. As it cooks, add in the soy sauce, rice vinegar and fish sauce. As they evaporate they will help to lightly steam the vegetables. Cook for about 5 minutes until the vegetables have softened but retain a bit of crunch.
- Stir in the sesame seeds and toasted sesame seed oil and leave the mixture to cool.
n.b. Never cook using toasted sesame seed oil, it kills the flavour. Always add at the end of cooking, and be careful not to over-do it, it’s a strong flavour
To make the dumplings
- Take a wrapper and place on a board. Spoon a little of the mixture onto the centre of the wrapper, being careful not to overfill. You’ll get a feel for how much is the right amount after you’ve had a couple of tries at making them.
- Have a little dish of water near you, and dip the outside of your little finger in the water, and then wet the edges of the wrapper with your little finger. Use your little finger as this keeps your other fingers dry to handle the wrapper, otherwise you will end up with a sticky doughy mess as you try to close it.
- Pull up the bottom half of the wrapper and fold in half, sealing the filling inside. Lightly press the edges to close the dumpling.
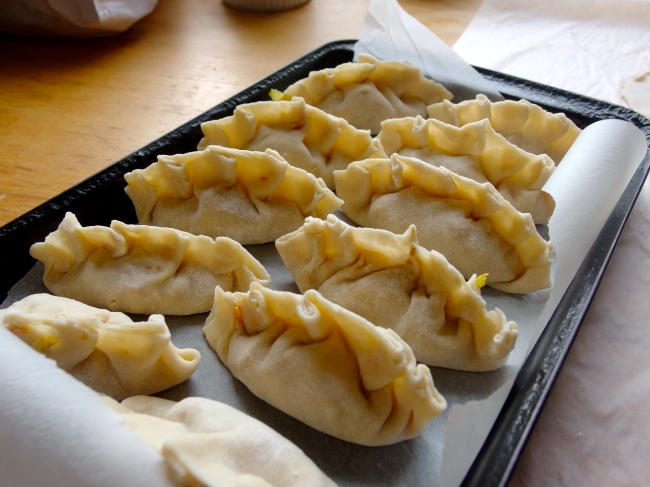
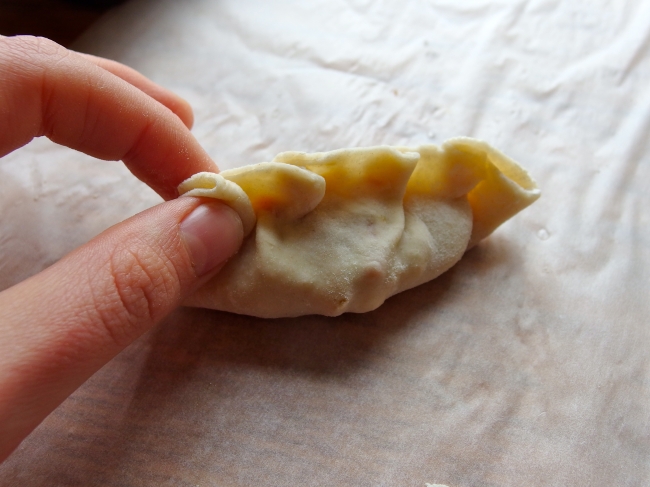
- Pick up the dumpling and sit it on its back, such that the edge you just closed is facing upwards. Crimp the edges by gently folding the edge onto itself, and pressing to keep the crimp in place.
Cooking the dumplings
- Heat some oil in a non-stick frying pan which has a lid. Sit the dumplings in the oil on their backs, with the crimped edge facing upwards. Fry the dumplings on a medium heat, there’s no need to move them around. Lift up the edge of a dumpling to see how it’s cooking, you want it to lightly brown.
- Once the bottoms of the dumplings have started to crisp up, pour in a big splash of water, just enough that there’s a thin layer of water, probably only 2mm deep. It’ll spit a bit so quickly clamp on the lid.
- Leave the dumplings to steam with the lid on as the water evaporates.
- Once the water has evaporated, let the dumplings fry for a minute or two longer, and check that the bottoms have browned nicely and feel crisp.
- Enjoy dipped in soy sauce mixed with rice vinegar and chilli sauce, or a dip of your choice.

